Seems this is a good day for QGIS Oracle users. According this commit made by Jürgen QGIS now has built-in Oracle support. Win!
Native Oracle support can now see QGIS being opened up to a wider user base yet again. A large user base normally means more people willing to sponsor awesome new features and bug fixes. Having seen the growth in the user base from having native MS SQL Server 2008+ support I can imagine what it will be like with Oracle.
The list of formats QGIS can open and edit is getting larger and larger with each release. Is there a future for vendor lock in? I can’t see it.
Standard disclaimer about latest dev build and new features:)
This has been part of an ongoing effort from the documentation team since before the 1.8 release to bring our all our documentation into reStructedText rather then LaTeX. Moving to reStructedText allows quicker updates and a larger range of final output formats.
I would like to thank everyone who has been involved in this process as I know what a grueling process updating documentation can be.
Community notice
Just remember you don’t have to be a programmer to contribute to an open source project. If you think you could contribute to the updating of the QGIS documentation please contact the team on the mailing list.
If you need to do any kind of spatial operations in QGIS using Python or C++ you really want them to be as fast a possible in order reduce the amount of time you make the user wait. Lets take the simple scenario of a recent question that was asked on gis.stackexchange; Summing up values of neighboring polygons?.
I went for the SQL approach as I like how quick SQL can express what you need to do, however SQL is not the only way to skin a cat as spatialthoughts has shown in his blog post. Here Ujaval has used Python to find the neighboring polygons of each feature. Running the script on a small dataset yields results in reasonable time however running it on a larger dataset can take a long time.
In order to check if a feature touches another you need to have two features to compare against each other. The simple way to do this is to create two loops where you check each feature against every other feature. Here is a quick code example of just that.
layer = qgis.utils.iface.activeLayer()
# Select all features along with their attributes
allAttrs = layer.pendingAllAttributesList()
layer.select(allAttrs)
# Get all the features to start
allfeatures = {feature.id(): feature for (feature) in layer}

def noindex():
        for feature in allfeatures.values():
                for f in allfeatures.values():
                        touches = f.geometry().touches(feature.geometry())
                        # It doesn't matter if we don't return anything it's just an example

import timeit
print "Without Index: %s seconds " % timeit.timeit(noindex,number=1)
So the above code is pretty simple, just loop each feature and check against every other feature. No worries. No worries at least until you run this on a large dataset then I think you can see the issue here. Running the above code on a layer with around 28000 features takes 1912.41 seconds – that’s 31 minutes. Holy crap!
Note: We put all the features of the layer into a dictionary as it will make lookup quicker in the later index example.
How can we speed up the above code? Lets take a gander at QgsSpatialIndex
QgsSpatialIndex to rule them all
QgsSpatialIndex is a wrapper around the open source SpatailIndex lib and uses a RTree for an index method. If you don’t know what an index is you can think of it like the index in a book – a pointer to a location in the book rather then having to scan every page to find a word.
There isn’t much to using QgsSpatialIndex just insert each QgsFeature and it handles the rest, when we need something out we just use the intersects method to return any features inside an area.
layer = qgis.utils.iface.activeLayer()
# Select all features along with their attributes
allAttrs = layer.pendingAllAttributesList()
layer.select(allAttrs)
# Get all the features to start
allfeatures = {feature.id(): feature for (feature) in layer}

def withindex():
        # Build the spatial index for faster lookup.
        index = QgsSpatialIndex()
        for f in allfeatures.values():
                index.insertFeature(f)

        # Loop each feature in the layer again and get only the features that are going to touch.
        for feature in allfeatures.values():
          # Get the ids of all the features in the index that are within
          # the bounding box of the current feature because these are the ones
          # that will be touching.
          ids = index.intersects(feature.geometry().boundingBox())
          for id in ids:
            f = allfeatures[id]
            if f == feature: continue
            touches = f.geometry().touches(feature.geometry())
            # It doesn't matter if we don't return anything it's just an example

import timeit
print "With Index: %s seconds " % timeit.timeit(withindex,number=1)
Running this code on our 28000 feature layer returns the results in 10 seconds. 31 minutes down to 10 seconds by just using a spatial index. Nice!
So the next time you need to do some spatial operations remember to use the handy QgsSpatialIndex in order to speed up your code. If you don’t want to use QgsSpatialIndex, or need some more flexiblity, you could even use the Python RTree module.
Full code
layer = qgis.utils.iface.activeLayer()

# Select all features along with their attributes
allAttrs = layer.pendingAllAttributesList()
layer.select(allAttrs)
# Get all the features to start
allfeatures = {feature.id(): feature for (feature) in layer}

def noindex():
	for feature in allfeatures.values():
		for f in allfeatures.values():
			touches = f.geometry().touches(feature.geometry())
			# It doesn't matter if we don't return anything it's just an example

def withindex():
	# Build the spatial index for faster lookup.
	index = QgsSpatialIndex()
	map(index.insertFeature, allfeatures.values())

	# Loop each feature in the layer again and get only the features that are going to touch.
	for feature in allfeatures.values():
	  ids = index.intersects(feature.geometry().boundingBox())
	  for id in ids:
	    f = allfeatures[id]
	    touches = f.geometry().touches(feature.geometry())
	    # It doesn't matter if we don't return anything it's just an example

import timeit
print "With Index: %s seconds " % timeit.timeit(withindex,number=1)
print "Without Index: %s seconds " % timeit.timeit(noindex,number=1)
As QGIS is such a fast moving project I have decided to make this a regular blog post in order to highlight some new features added to QGIS. If you haven’t already, don’t forget to check out round one.
Remember that some of these features may still only be new which might change between now and the next official released version. With that out of the way lets get listing.
Atlas integration
If you are a regular user of QGIS Python plugins, and who isn’t, then you would have used the awesome Atlas plugin developed by Vincent Picavet. This great tool can be used to generate mapbooks, or an atlas as some people like to say, using a coverage layer and a print composer. What makes this even more awesome is that it is now built into the print composer.
Atlas composer intergration
The builtin atlas function also gives you the ability to use an expression to do runtime text replacement, including access to all the fields on the coverage layer. The coverage layer doesn’t even have to be a region layer, it can be a simple point layer, or even a line layer. You can see the result of me running the atlas generation from the above example here
Big thanks to Oslandia for integrating this great feature, and the companies sponsoring the work.
New Python console
This new addition comes from the great work that Salvatore Larosa has been doing to add a better Python console to QGIS.
The new Python console includes attribute auto complete, syntax highlighting, better copy and paste, uploading to codepad, the ability to run code from a file, etc. You don’t realise how much difference there is until you go back to using the old one in version 1.8.
New Python console
Tabbed and groups in builtin forms
One of the things I really loved about QGIS, coming from MapInfo, was the builtin forms. Just having the ability to enter data using controls like combo boxes, calendar widgets, etc makes you one step closer to having better data. This feature is the exact reason I setup a 67 year old for kerb data collection.
As good as they are the builtin forms have an issue of ending up with as a big scrolling list with lots of fields; also the lack of the ability to group or put fields on tabs in the UI meant you had to create a custom form. Well not any more.
There is now a combo box on the Fields tab that allows you to build a generated form but also add tabs and group boxes. You can even have the same field shown more then once on the form, handy for something like an ID field that you would like to show on each tab.
With this new ability the builtin forms can get me 95% of the way for data entry jobs, the other 5% I just make a custom form – but that is very rare.
Sextante
Sextante is a great and powerful analytical framework that has been added to the core of QGIS thanks to Victor Olaya. This is not a feature that I use a lot but this is only due to most of my work being in development and not analysis, however that doesn’t mean that it’s not a really cool feature.
One of the greatest things about the Sextante toolbox is that it allows you to integrate other great open source tools like GRASS, SAGA, R, OTB, etc, right into your QGIS workflow and view the results in the canvas. It even includes a modeller so that you can build a connected diagram of all the bits of your process, even if it crosses between programs.
The toolbox
For me what is even better is that you can use Sextante in your plugins or custom Python code. Sextante has a Python interface – well the whole thing is written in Python – that you can use to run a Sextante supported algorithm.
“(InaSAFE) is very beneficial for all of us. It’s a good example of our partnership.”
Dr Susilo Bambang Yudhoyono – President of Indonesia
Some of the improvements include:
A new loadFromTemplate method, in the API, that can do text replacement in the QGIS composer template.
Better support for EPSG:4326 scale bars
Multipage in one composer
Automatic overview frame in map frame
HTML frame
Zebra style grid frame border
More control of grid labels. Inside, outside, disabled
etc, etc
These are great additions to the QGIS composer and I have already used the overview frame feature along with the new atlas integration to make some quick nice looking map books. \
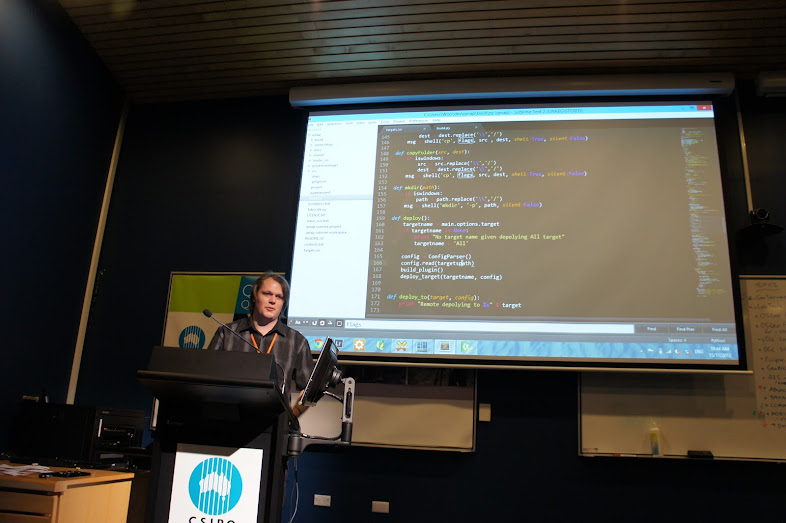
Last Thursday and Friday was our first local Australian FOSS4G event which was hosted at the CSRIO building in Brisbane. Very big thanks to CSRIO for hosting the event. The venue was setup perfectly for hosting an event like this, including dual projectors for presenting, video calls over to Perth, etc.
The first day was done using a un-conference style of event. This is the first time I’ve been to a un-conference and I liked the format a lot. Once everyone was there on the first morning we collected ideas from people and everyone voted on which ones they would like to see. After we had picked enough topics Shaun and I made a program for the day and we started.
The second day was a code sprint. I worked on converting a MapBasic scripts from one of the guys to QGIS, and Jody enlisted the others to help check the headers of the GeoServer project so that it can finally pass OSGeo incubation.
Overall I think it was a very successful event. I would like to make these a yearly event if we can, provided that we have people to talk, or projects to work on.
Ever since I added expression based labels, including the new expression builder UI, something that I always wanted to add is the ability to define custom user defined functions in Python (or C++) and use them in an expression. The expression engine is used for labels, rulebased rendering, layer actions, field calculator, and atlas composer tags. Thanks to the all the awesome work on the expression engine by Martin all this cool stuff is now possible.
Today I pushed a commit into master that adds the ability to define a function in Python (or C++), register it in the expression engine, then use it anywhere expressions are used.
The good stuff
Lets take a use case from Ujaval Gandhi and his example of counting vertices for each feature.
First we need to import the new qgsfunction decorator function from qgis.utils. The qgsfunction decorator will take a normal Python function, wrap it up in the class used to define a function, and register it in the engine.
So what does an empty function look like:
from qgis.utils import qgsfunction
from qgis.core import QGis

@qgsfunction(0, "Python")
def vertices(values, feature, parent):
	pass
@qgsfunction(0, "Python") means we are defining a new vertices function that takes 0 args and lives in the “python” group in the expression builder UI. Any custom function must take (values, feature, parent) as python args. values is a list of QVariants passed into the function, feature is the current QgsFeature, and parent is expression engine node (you use this to raise errors).
Lets stick some more logic in there:
from qgis.utils import qgsfunction
from qgis.core import QGis

@qgsfunction(0, "Python")
def vertices(values, feature, parent):
	"""
		Returns the number of vertices for a features geometry
	"""
	count = None
	geom = feature.geometry()
	if geom is None: return None
	if geom.type() == QGis.Polygon:
		count = 0
		if geom.isMultipart():
		  polygons = geom.asMultiPolygon()
		else:
		  polygons = [ geom.asPolygon() ]
		for polygon in polygons:
		  for ring in polygon:
		    count += len(ring)
	return count
Pretty simple. Get the geometry from the feature, check if it’s a polygon, if it is then count the number of vertices and return that number.
Now that we have that all done we can save it into a file in our .qgis/python folder, lets call it userfunctions.py (note you don’t have to save it here, anywhere that QGIS can find it will do. Anywhere on PATH)
Lets open QGIS and run import userfunctions.py:
Importing functions from userfunctions.py
Now open the label properties for the layer:
The new function shown in the expression builder
Nice! Notice also that the function doc string is used as the function help. How cool is that. You can also see the $ sign in front of the function, this is because any functions that take no args are considered special and use the $ sign as a convention, this is all automatic when the function is registered.
And the result is:
The label using the new function
You can even use it in the rule based rendering:
Rule rendering using new function
Enjoy!
Notes
You must unregister a function once you are finished with it using QgsExpression.unregisterFunction(name). This mainly applies to plugins where the user might unload your plugin and the code is no longer available. In the above example we could import userfunctions and never unregister because we plan on using it for the whole session.
I’m very please to announce the Australian QGIS User Group. Chris Scott (DMS) and I created this group because the interest in QGIS here is growing fast and it would be nice to have a place where us Aussies can hang out and chat about QGIS stuff, discuss local issues, organize local events, put shrimps on the barbie.
My ultimate goal would be to turn this into a full user group much like the Swiss QGIS User Group but for now we will keep it light.
Everyone is free to view the content of the home page and the Google group, however you have to request to join the Google Group to post. This is only so that we can keep it local and not reduce the official QGIS mailing lists.
So in saying all that. If you live in Australia. Use QGIS, or are interested in QGIS. Feel free to join the group.
From QGIS 1.8 and onwards the Plugin Installer plugin will no longer include the option to add the 3rd party repositories. This was by design and intended to move people over to using the official plugin repository at http://plugins.qgis.org/ so we can provide a richer experience and keep everything in one place.
If you have plugins that are still not on the official repository then I would strongly recommend that you migrate them as a lot of new 1.8 users will be missing out on your great work.
New fresh QGIS feature! So fresh in fact you can still smell the wet paint :)
QGIS (development build) can now display map tips using HTML (a subset anyway).
To enable the new map tips: Open the Layer Properties dialog for a layer and select the Display tab
Display tab to set HTML map tips
In action
Layer properties for HTML map tip
Notice how we can also use a QGIS expression. Anything inside [% %] will be evaluated and replaced with the value in real-time. We can even use a CASE statement. Pretty cool!
And the result when hovering over a feature
HTML in QGIS map tip? Yes! WOOT!
Hold on. Pause the track! We can even use some CSS to make it more fancy.
<style>
h1 {color:red;}
p.question {color:blue;}
</style>
<h1> [% "NAME" %] </h1>
<br>
<img src="[% "image" %]" />
<br>
<p class="question">Is this place a country?</p>
<br>
[% CASE WHEN "TYPE" = 'Country' THEN 'Yes' ELSE 'No. It is a ' || "TYPE" END %]
Version note: This will only work in the latest dev build of QGIS – not in 1.8
The lack of uni for the next couple of weeks has left me some time at night to work on some features that I really wish QGIS had. One of these features was better date and time support in the expression engine. Date and time is an important concept when working on inspection data and not being able to style my features in QGIS using date operations was bugging me. So in good open source fashion I added some.
Here are the current functions (more to come in the future):
$now – returns the current date and time
age({datetime},{datetime}) – returns the difference between the two dates
todate({string}) – converts a string to date type
totime({string}) – converts a string to time type
tointerval({string}) – converts a string to a interval type (details below)
day({datetime} or {interval}) – returns the day from a datetime type or the number of days in a interval.
hour(…) – Same as above but for hours
minute(…) – Same as above but for minutes
second(…) – Same as above but for seconds
day(..) – Same as above but for days
week(..) – Same as above but for weeks
month(…) – Same as above but for months
year(…) – Same as above but for years
{datetime} – {interval} = {new datetime} – returns a new datetime subtracting the interval
{datetime} + {interval} = {new datetime} – returns a new datetime adding the interval
The interval type
Functions like age(..),tointerval(), {datetime} -/+ {interval}, day(..), hour(..), etc, use, or return, Intervals. An Interval is a measure of time that we can use for different things. An example of an Interval is ‘1 Year 2 Months’ this is then converted to a number of seconds and used for any calculations.
For example one can take away 10 days from the current date by doing the following ( -> marks the output ):
todate($now - '10 Days')
-> 2012-06-20
as
todate($now)
-> 2012-06-30
We can also do something like:
todate($now + '2 Years 1 Month 10 Days')
-> 2014-08-10
The age() function will return an interval which we can use extract what information we need.
The number of days between two dates:
day(age('2012-06-30', '2012-06-10'))
-> 20
-- Think of it as '2012-06-30' - '2012-06-10'
-- Note: day(), month(), etc, functions return doubles so you can get
-- 21.135234 days if you are using date & time type rather than just date type
-- wrap the result in toint() to get a more sane output.
Day() will also work on a plain date:
day('2012-06-30')
-> 30
We can even get the number of seconds between two dates:
Currently the only date format supported is {year}-{month}-{day} as seen in the examples above. Shouldn’t be too hard to add support to the todate(), todatetime(), totime() functions for giving it a pattern to use when converting the string e.g. dd-mm-YYYY, or something like that.
More on this fancy new stuff
When I wrote the new expression builder dialog a while ago I made it dynamic so that any new functions added to the expression engine will show up automatically. So here they are:
List of new date and time functions.
We can also use these functions in the rule based rending, which is where the power really comes in. Lets see something like that in action:
Styled using days and years
Should be pretty straight forward to understand. We are using the age() and day() functions to style the events that are older than 30 days, within 30 days, for today, or in the future. We also check the year of the event using year() and year($now) to make sure we only see this years events, or style them differently depending on if they are last years events or in the future.
This is the result of the above rules:
Result of using date functions in rule based renderer
I’m also using the date functions in the expression based labelling to label the features using the following expression:
CASE
WHEN year( "dateadded") < year($now) THEN
	'Last Year'
WHEN day(age("dateadded", $now)) < 0 THEN
	day(age("dateadded", todate($now))) || ' Days old'
ELSE
	day(age("dateadded", todate($now))) || ' Days to go'
END
Well that’s it. Hope you find it handy in your day-to-day mapping. I know I will be using it a lot.
Thanks to Martin and Jürgen for the code reviews during the process; venturing in an unknown part of the code base always makes me nervous but that is all part of learning, and sometimes you can make some pretty cool stuff. Some other random notes: The general idea has been modelled of how Postgres handles dates and times, it’s not an exact copy but follows the same kind of ideas. The interval class also uses the same number of seconds for one year that postgres does so that we can be consistent with the output.